I love learning new types of crafting! Today, Emily is here to share something I had never even heard of but that sounds totally awesome: Kumihimo! Read on for more details 🙂
****************************************************
Hey Y’all! My name is Emily and I blog over at A Tossed Salad Life. People often give me a strange look, or pause when I tell them the name of my blog. You see, I live in a stepfamily, which some people call a “blended” family. When I was engaged, a friend and mentor told me that living in a stepfamily was less like a blended smoothie, and more like a tossed salad. Each person has his/her own special flavor that stands alone, but together all of the pieces make something delicious. My blog includes deals with children, cookies, crafts and crockpot creations, I’d love it for you to stop by or connect with me via Facebook, Twitter, Instagram or Pinterest.
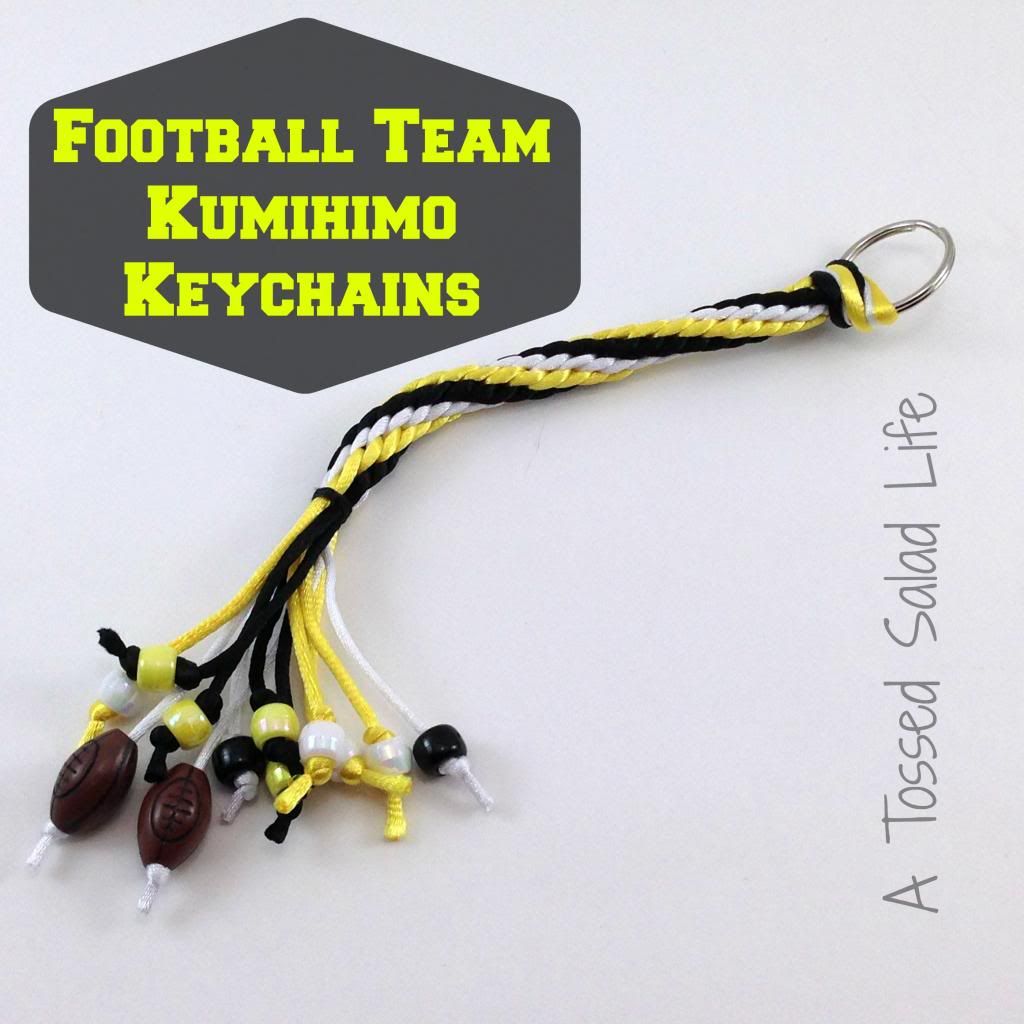
Today I’m going to share with you my newest crafting obsession. It’s super for doing with your older kiddos, and can be done anywhere– Kumihimo! Perhaps you have heard of it, but if not, Kumihimo is a style of Japanese braid making. It is great fun, and involves using a loom. If you’d like to make one for yourself, you could make a loom out of a styrofoam plate, or you can easily order one at a place like Consumer Crafts or even Amazon. They are relatively inexpensive, and you can get a starter kit for under $10. As an alternative to the Kumihimo jewelry that I’ve seen a lot of places, I decided to make a keychain for myself. After playing around and making a very simple kumihimo keychain, my sister-in-law asked if I could make them for our family’s favorite football team– the Pittsburgh Steelers! Once I came up with the design, I realized that this would be a great tutorial to share in this guest post, as the start of football season is just around the corner!
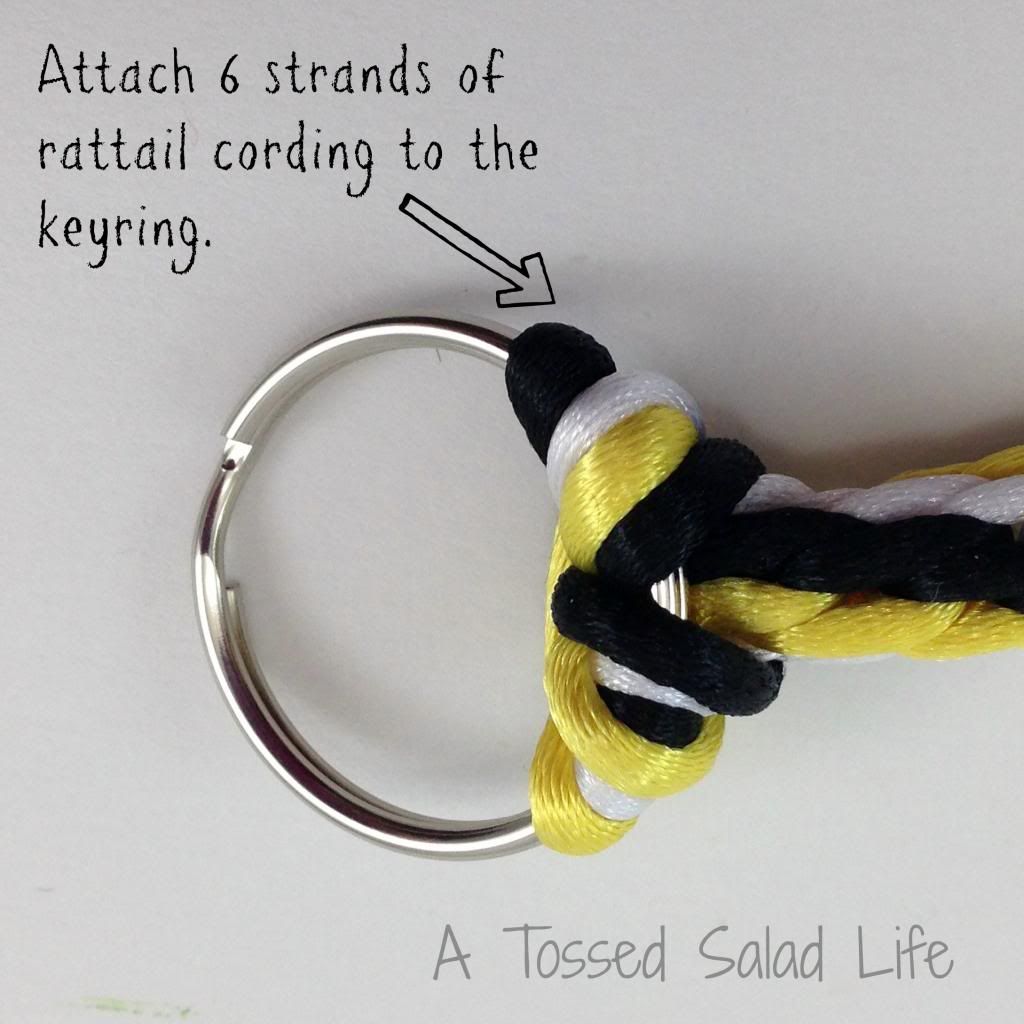
To start this project, you will need rattail cording in the colors of your favorite team. You will need 6 inches of cord for every one inch of keychain braid. (Note that this is different from the standard kumihimo measurements, as you will be using each cord as two sections of the braid as you’ll be knotting it to the keyring.) Cut 6 lengths of rattail in each of the 3 team colors and secure it to the keyring like this:
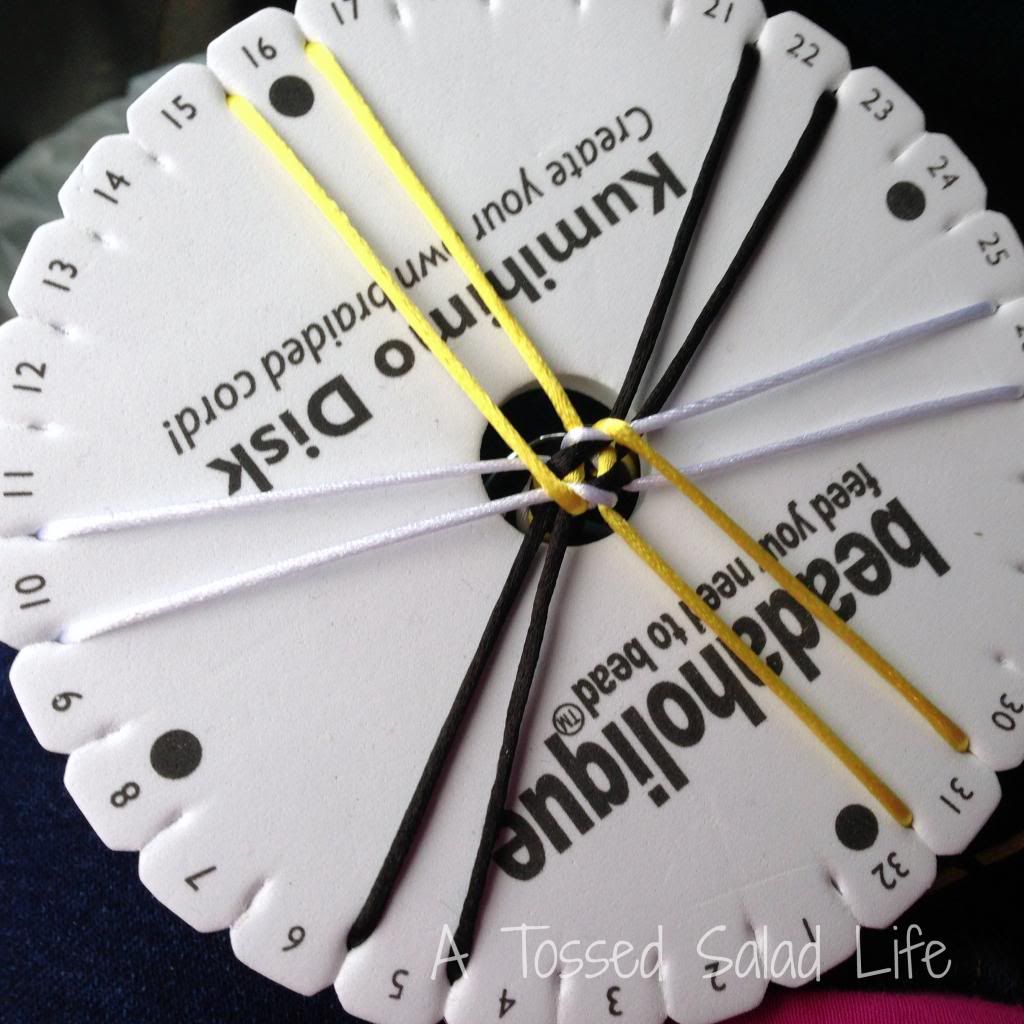
Once the rattail cording is attached to the keyring, you will need to drop the keyring through the center of the loom. You’ll need to position the cords in equally spaced locations around the loom. First, put the first color between the 32 and above the black dot on the loom. You’ll then need to divide the 32 spaces into roughly six evenly divided spaces. You won’t be able to do this perfectly with a standard store-bought loom as 6 doesn’t go evenly into 32. You will need to separate each color by 3 to 4 spaces. To show you what it should look like, I took a picture of the braid in progress. Again, as I was braiding already when I took this picture, the spacing is slightly off.
Although this is a 12-stranded kumihimo braid, the technique is the same as the basic 8-strand braid. There are some wonderful tutorials on this braid including this one, which includes images and the great the basic instructions, “Left Up, Right Down, Turn.” When you turn, you will not be turning a full 90 degrees that is turned with the 8-strand braid, rather you will turn until you reach the next color, and have it pointed downward. The consistent colors being lined up in the pattern shown above will create the spiral pattern. If you don’t line up the colors in the manner I’ve shown, the color pattern will be random or scattered and will not look like this:
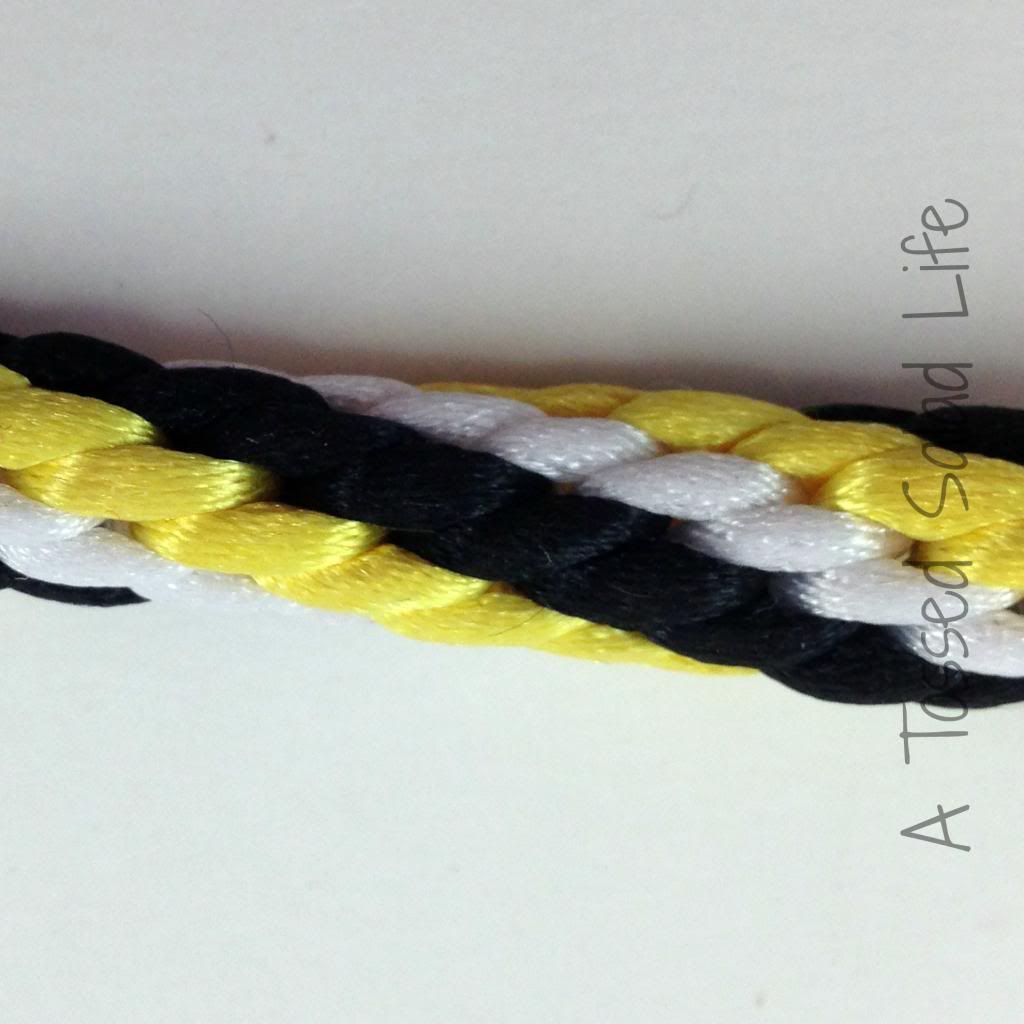
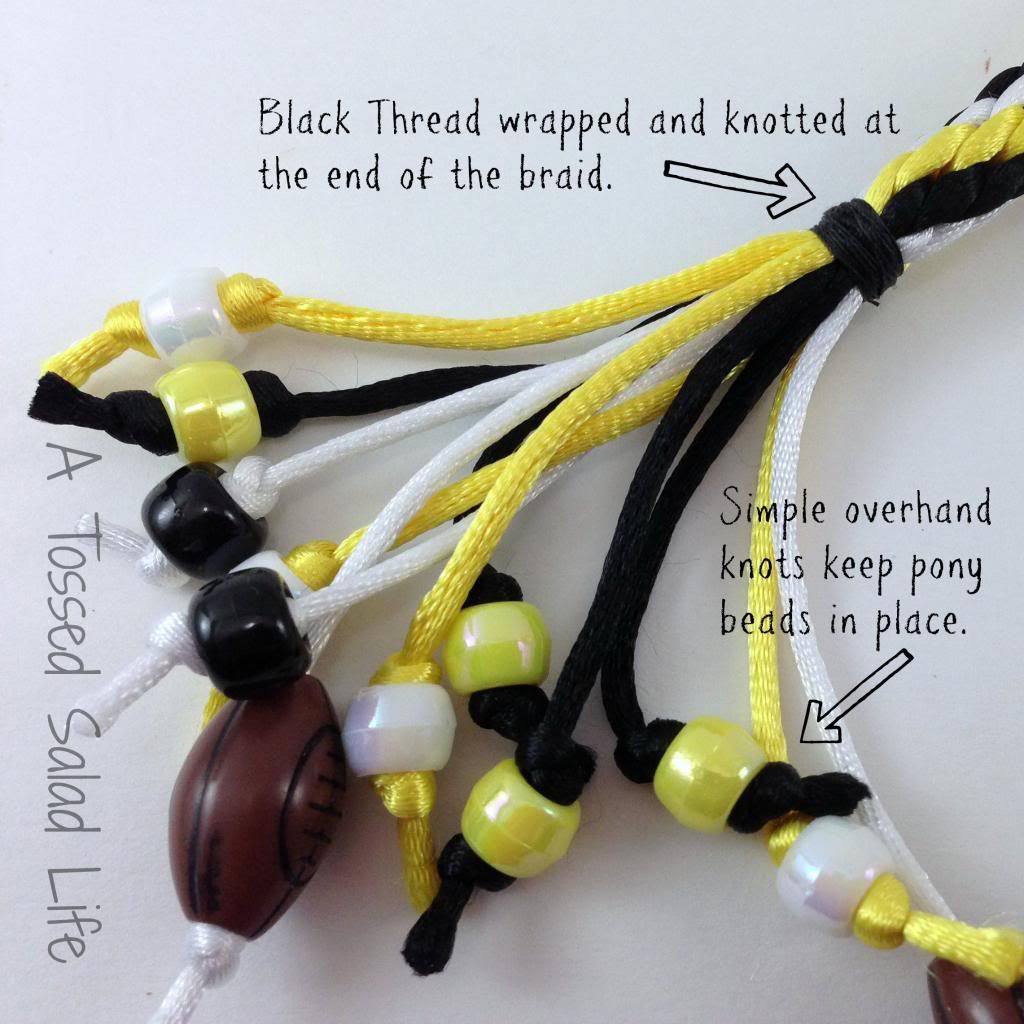
One other recommendation, you should turn with the same hand and move the cords with the same hand. This creates consistent tension, as your non-dominant hand may not braid with the same level of tension as your dominant hand. When the braid has reached the desired length, you will remove the braid from the loom. You will then take a matching length of thread, about 2 feet long, and wrap and knot it at the base of the braid. You will want to knot and wrap the thread repeatedly in order to insure that it is securely attached. Trim the rattail ends to even out the cords. Attach the pony beads and football beads to the rattail ends. Use an overhand knot to secure the beads, with one above the bead and one below the bead.
You should now have a super football keychain that is perfect for your favorite football fan!
************************************************
Isn’t that super cool? It is perfect for this time of year too since football season starts this month for most colleges {Go Hokies!}. Thanks so much, Emily, for sharing this really neat type of braiding with us.



What a fun guest post and I learned something new! Thanks so much for the inspiration!
Happy day!
karianne
Isn’t that an awesome skill? I was so interested as I was reading through the post. I can’t wait to try it.