Hi there! Isn’t this birthday extravaganza awesome? I hope you have enjoyed all the awesome posts so far this week!
Today, Cathy from Lemon Tree Dwelling is here to share a great idea for St. Patrick’s Day! Enjoy!
*********************************************************
Hi! My name is Cathy and I am so excited to be guest posting for Shannah today at Just Us Four! With the Superbowl behind us, and Valentine’s Day just around the corner, I thought maybe we could get a head start on some St. Patrick’s Day gifts. These are easy & inexpensive, and they make the perfect personalized gift from you or your kiddos to someone you love!
Lucky mugs. Actually, I tend to think that all mugs are lucky. I can recall numerous times in my life when the ONLY thing that got me out of bed was the promise of a strong cup of coffee (or three!!) Like every time I’ve had a newborn…or anytime I’ve had a kid who was up sick in the middle of the night…or how about the year we moved into a fixer-upper when I was 7 months pregnant…..!? Yep, at times like these, a warm mug in my hands makes me feel like the luckiest girl in the world.
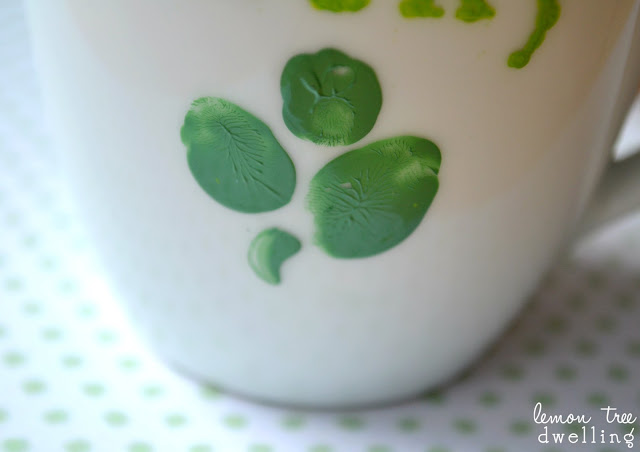
See, I think luck is about so much more than winning the lottery or making it big. I think luck is about all the small things that get us out of bed in the morning! Like our family, our friends, our work, our hobbies, our passions…. and, in a very literal sense (mine pull me out of bed every single morning), our kids! Which is why I love the idea of theseLucky Mugs with fingerprint shamrocks – the perfect daily reminder of just how lucky we really are (an especially helpful reminder when you have just been woken up 5 times in one night…!)
Here’s what you will need:
- white mug (I found mine at Goodwill)
- flexible alphabet stencils
- small paintbrush
- bakeable glass paint (dishwasher safe)
Directions:
1. Wash & dry mug, then wipe area to be painted with alcohol. Let dry completely.
2. Use fingerprints to make shamrock (I made 3 leaves – one for each of my kids) and use a paintbrush to make a stem.
3. Let shamrock dry completely.
4. Using stencils and a small paintbrush, paint “lucky” or any word of your choice, one letter at a time. It works well to tape the edges of the stencil onto the mug to hold it in place.
5. Let paint dry completely between letters.
6. Once all the paint has been applied and dried, use a toothpick to scrape away any imperfections.
7. Follow baking directions on paint bottle.
As you can see, my mug is still far from perfect. There is too much paint here, not enough paint there….. But I actually kind of like it that way. It’s kind of like life – imperfect, but lucky nonetheless 🙂
******************************************************************
Thanks so much Cathy! Be sure to go visit Lemon Tree Dwelling to see the other amazing stuff Cathy has to share!


